A stylish barrel sauna built outdoors is the latest trend among sauna enthusiasts. And what better way to have one for yourself than DIY?
When we talk about saunas, you’ll most likely think about a sauna bath or enclosure built indoors. In fact, you may well have used one such sauna at a gym or a day spa.
Nevertheless, a DIY barrel sauna is unlike any other, as it elevates the concept of sauna bathing to a whole new level.
You see, barrel saunas offer a unique blend of a traditional outdoor Finnish sauna bath and a charming nature-inspired modern aesthetic. Add to it the fact that these are easy-to-build saunas with compact options available, and you’ve got the perfect recipe for building a home sauna by yourself.
Now, the idea of building something like a sauna bath, that too from scratch, might sound daunting. You’ll likely find yourself searching how to build a barrel sauna using DIY kits and materials. But you can rest easy as we’ve compiled a detailed barrel sauna building guide to help you build one from start to finish.
So let’s get building right away.
What exactly is a barrel sauna?
Barrel saunas are not like your typical sauna place; they’re an entirely different concept altogether. So before we begin with the building process, it’s essential you understand what exactly a barrel sauna is.
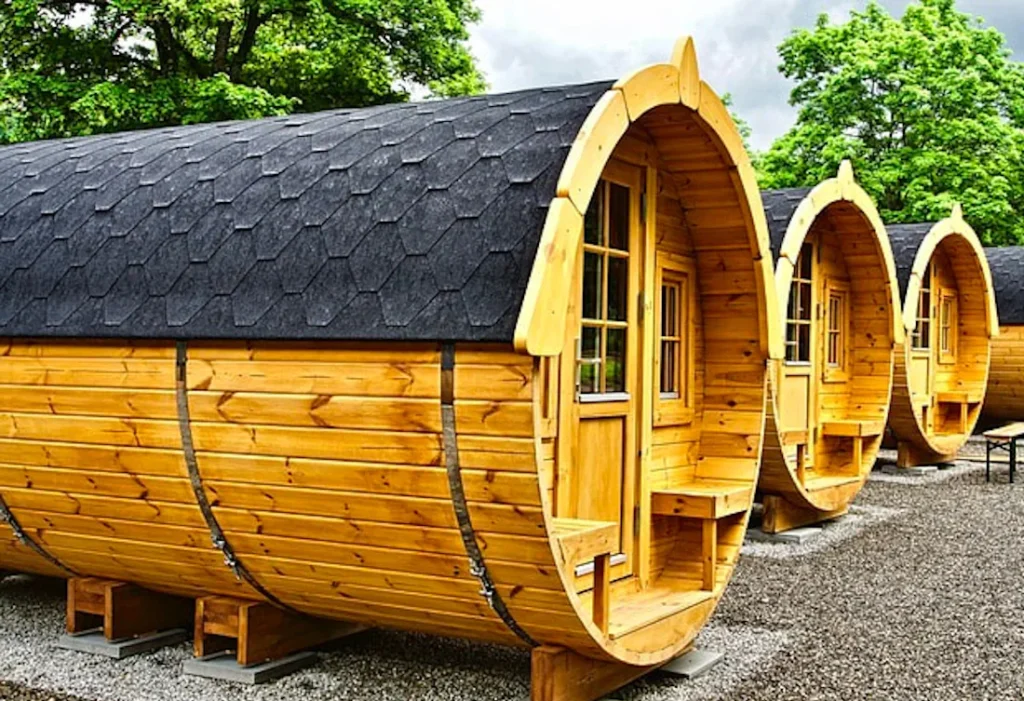
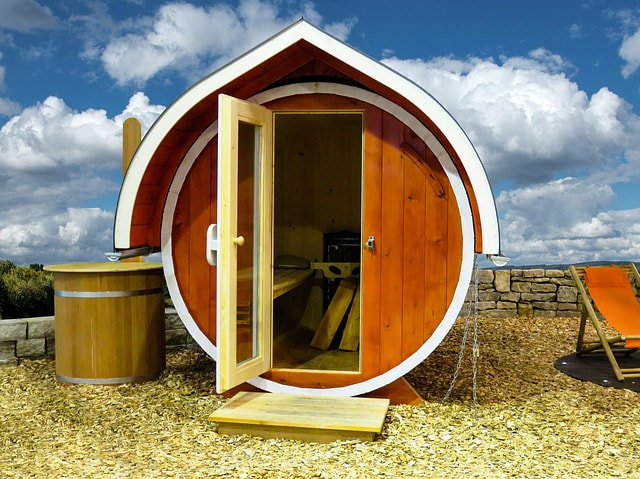
As you might already have figured out, a barrel sauna features the shape of a typical barrel and is installed outdoors. You can think of it as a life-sized wine barrel with a tilt of 90 degrees.
Just like a regular barrel, a barrel sauna also uses wood planks with notched edges to create a cylindrical shape. Herein, stainless steel straps are used to tightly wrap the post-assembly barrel and keep the entire structure from falling apart.
Also, while some barrel saunas may have glass windows and ceilings, others might stick to the aesthetics of a classic barrel. And depending on your liking, you can choose between a naturally lit and a traditional all-wood barrel sauna.
How does a barrel sauna work?
Well, given the distinctive shape of these saunas, it’s not surprising for first-time users to believe that barrel saunas use a similarly unique heating method.
However, when it comes to working, a barrel sauna isn’t much different from other saunas.
How?
To begin with, a barrel sauna also uses the same kind of sauna heaters that are used to heat other standard saunas. For instance, if you’re using an electric sauna heater from Amerec to heat your indoor sauna, you can use the same for a barrel sauna too.
Not to mention, these saunas are also compatible with wood burning and gas heaters.
Also, notwithstanding the design of a barrel sauna, you still need to prep it like a regular indoor or outdoor sauna. For instance, you’ll be running electrical wiring and water lines, enclosing the space and insulating it, etc., just like you’d in traditional sauna rooms.
In short, these barrel-shaped sauna baths are in the same league as their regular square or rectangular-shaped counterparts in terms of working.
It’s also essential to remember that cleaning a sauna is important to maintain hygiene and prolong the life of the sauna.
Some important things to consider before you start your DIY barrel sauna project
Now that you know what barrel saunas are and how they work, you might be eager to start building one in your backyard.
But before we start with the building process, there are some critical sauna aspects that you’ve to figure out. And that includes sauna location, size, materials, etc., to name a few.
Let’s have a look up close at these considerations:
The location
The most important factor before you undertake a steam sauna project is deciding on the location. That’s because your installation location will determine how large you can build the sauna, the type of materials you’ll need, and whether or not you need a power line, among others.
And since barrel saunas are built outdoors, here are a few locations you can consider:
A. Backyard
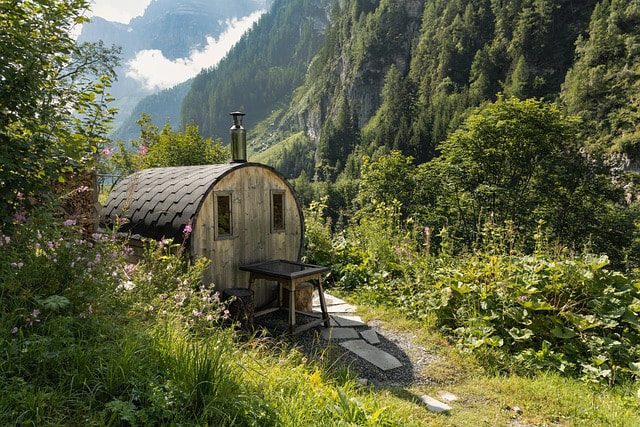
Backyards are the most preferred location for building outdoor saunas, including barrel saunas. And for good reasons, as not only do backyards offer sufficient space, but they also let you integrate an all-natural elegance in the sauna.
Also, it goes without saying that a backyard offers unmatched privacy when compared to other locations, such as the garage. You see, the very idea of an outdoor barrel sauna is to maximize your sauna bathing experience, and that calls for a peaceful and secluded spot.
Similarly, if your barrel sauna plans include using a wood heater, the backyard is the perfect spot to do so without likely bothering your neighbors with smoke.
Note: when building a backyard sauna, you might also have to run electrical wiring and plumbing lines, among other things. And that can be a challenge, especially for hobby DIYers.
B. Garage
Do you have an unused garage or parking area on your property?
If yes, it’s one of those locations where you can build your barrel sauna.
In fact, there are numerous advantages that locations like garage offer, including;
- Pre-existing electrical wiring and an easy-to-draw plumbing line.
- Protection from outdoor weather, such as heat, rain, snow, etc., to increase the longevity of the sauna.
- There’s no need to create a separate drainage system, as garages are mostly connected to the home’s drainage system.
- It’s highly likely that your garage is insulated, like your living area, in which case you’ll need a minimal investment in sauna insulation systems.
Nevertheless, it’s worth mentioning that a sauna built in a garage will have its limitations too. For instance, it might lack the desired privacy as garages are right in front of homes. Also, it will lack the essence of a truly outdoor sauna.
C. Poolside
Have you ever wondered how the Finnish took a sauna bath in the ancient days?
Well, they’d always complement a hot sauna session with a plunge in freezing cold water.
And while modern-day sauna facilities do provide a shower to create the same effect, you can replicate the good-old Finnish tradition by building your sauna right by the pool.
The process of barrel sauna building by the pool is the same as in the backyard. So all you need to do for an extra effort is fill the pool and decrease the water temperature to make it chilling cold.
The size
The next essential consideration for barrel sauna DIY is the enclosure size. And that is determined by a host of factors such as the number of bathers, availability of space, sauna heater type, etc.
To start with, your installation location plays a crucial role in deciding bath size. For instance, although there’s enough space to have a bigger sauna in the backyard, there are space constraints in the garage.
Next up, you should factor in the total number of sauna bathers who’ll be using the sauna at a time. And for one to two people, this will translate into a sauna enclosure with a minimum depth of 4-5 feet.
Furthermore, your choice of sauna is also an important size determinant. That’s because while electric sauna heaters need less space, some gas and wood-burning sauna heaters can take up a huge chunk of space.
If you’re looking for alternative DIY sauna projects, you might also be interested in Building a DIY Sauna Tent for a more portable and flexible sauna experience.
Sauna wood
Yet another factor, and arguably one of the most critical ones for barrel sauna plans, is the wood. And this becomes even more important in the context of outdoor DIY saunas like our barrel sauna project.
You see, wood quality is not just about the strength and durability of your sauna, as it also has a say on sauna insulation and overall bather comfort. Moreover, from a DIY perspective, it’s essential to go for such wood that’s easy to handle and not otherwise.
Not to mention, your wood should be such that it can withstand extreme heat and humidity while also remaining free from knotting.
As such, we suggest you go for the best quality wood, notwithstanding the price tag.
Here are some sauna wood types you can incorporate into your barrel sauna DIY plans:
- Douglas fir
- Nordic spruce
- Hemlock
- Pine
- Common aspen
Sauna heater
Sauna heaters are all about making your sauna enclosure warm, but the way they heat the sauna bath makes all the difference. And to that end, choosing a sauna heater that is apt for your needs is essential.
For instance, if you’re looking for a compact and energy-efficient sauna heater, then electric steam sauna heaters should be apt. However, wood-burning sauna heaters are highly sought after in outdoor saunas to create an authentic Nordic sauna ambiance.
Note: you can also consider installing infrared sauna heaters to make an infrared barrel sauna.
The list of tools and materials for barrel sauna DIY
Tools:
- Router table
- Table saw
- Stave cove bit
- Stave bead bit
- Groove bit for wall
- Rubber mallet
- Hammer
- Essential carpentry tools
Materials:
- Cedar boards
- Wire rope for sauna barrel
- Rope clamps
- Turnbuckles for the sauna
- Nails and screws
- Sauna heater
How to make DIY barrel sauna?
Having factored in the important barrel sauna considerations, you can finally start building it.
And even though sauna building isn’t simple, we’ve sought to make it easier for you by dividing the entire building process into eight steps. All in all, here’s how to build a barrel sauna from scratch:
Step 1. Prep up the staves
Staves in a barrel sauna serve a double purpose, as not only do they allow for a snug fit, but they also let you create a barrel shape. And to that end, we suggest you use a bead and cove joint.
To prep the staves, you can run the wooden board through a router table and also cove router bits. In fact, you can start from the bullnose side and create a small area for the hinge to sit firmly.
Altogether, you should put each of the boards four times through a router and then use a sharpening tool to clear the rough areas on the stave’s bullnose side.
Lastly, both the top and bottom staves should have two convex edges in order to prevent any water leakages.
Step 2. Prepping dado joint
Having prepared the staves, it’s now time to take the staves and make dado cuts into them and create dado joints. This will ensure that both front and end caps on the staves fit into these joints.
There are two ways you can prepare the dado joints:
- First, you can use a dado blade to make the joints. But this method calls for removing the table saw’s safety cover, thus posing safety risks. Meaning dado blades aren’t ideal for hobbyists and DIYers, among others.
- Second, you can use the table router but with a straight flute router bit. And even though it takes three moves or passes, it doesn’t carry the safety risks of a dado blade.
Step 3. Build the front and back end caps
For building the end caps, both front and back, the tongue and groove joints need to be routed so as to make dual squares (each with a sixteen-board width).
Once routed, you can take the boards and make circular cuts.
Now, you can rough cut some of the boards, as these will come in handy for the top and bottom sections that are narrower than the middle ones.
Step 4. Build the sauna door
Did you know that sauna doors are one of the easiest to build structures in a DIY barrel sauna?
To build your sauna door, you can cut out one of the two straight barrel sides to the measurement of a door and then frame it back using door clamps.
Moreover, you can also build sauna windows into this door, as this will save you from extra structural framing on the sauna walls.
Step 5. Prepare the location
As basic as it may sound, prepping the location of the sauna installation is crucial, as your sauna needs to stand firmly. And to do so, you’ve to ensure that the location is flat and solid ground.
Meaning your sauna location can be anywhere from a concrete surface to a gravel base to a sturdy deck
Step 6. Assembly
This is an essential step in building a barrel sauna, as the strength, safety, insulation, etc., all depend on how well you assemble the sauna.
We can categorize sauna assembly into four sub-steps, which include:
Setting the cradles and staves in place
The first step in assembling a barrel sauna involves lining the cradles up and screwing in enough staves till they entirely cover the cradles.
Herein, you should ensure that the dado joints are aligned well and that the cradles and staves are firmly positioned in their place.
Putting the sauna walls
Having placed the cradles and staves, you can now start putting up the walls for your sauna. And for this process, you might need someone to assist you with placing the end discs into the staves’ dado cuts.
Inserting the staves
With the wall in place, your remaining staves can now be placed all the way up.
Here, you should also be watchful of the dado joints to make sure they line up exactly the way you want them to.
Tighten the wire rope
Now that the sauna is finally up, you can make use of the wire ropes and rope clamps to tighten the entire structure together and finish up the assembly.
Step 7. Installing sauna benches
When it comes to installing sauna benches, there are two ways you can go about it.
- First, you can buy ready-to-install benches to the size of your sauna and simply install them in the enclosure.
- Second, you can custom-build sauna benches. This way, you can create a sauna interior design precisely the way you want.
Step 8. Placing the sauna heater
Lastly, you’ve got to install the sauna heater in the enclosure, which will need working with the electrical and plumbing systems depending on the heater type.
If you’re installing an electric heater, it’s important to have the wires safely placed. Similarly, when installing a wood heater, you should ensure that the chimney is placed perfectly.
Is a DIY barrel sauna kit worthwhile?
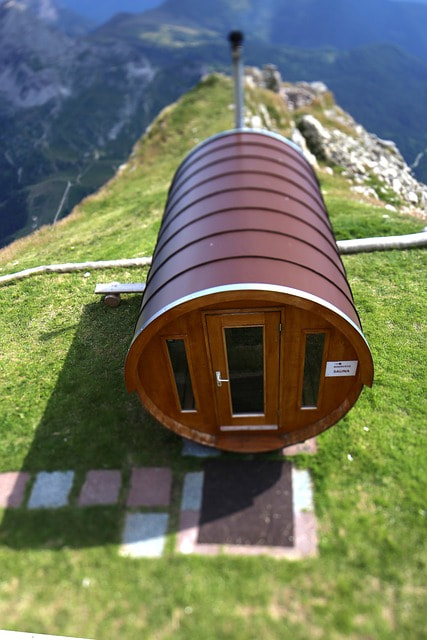
Yes, a barrel sauna kit is totally worth the investment.
You see, from cradles to staves to walls to sauna heaters, barrel sauna kits include everything that you need to assemble the sauna. And that saves you from the hassle of building a barrel sauna from the bottom up.
Nevertheless, if you’ve got the time and patience, it’s still a good idea to build your sauna from scratch.
Conclusion
As a DIYer, building your own sauna might be one of your dream projects. So why not go innovative and create a barrel sauna?
True that building such a sauna is no easy feat, but successfully completing such a project will also give you a great sense of achievement.
Furthermore, with the right sauna etiquette rules in place, you can also make it last your barrel sauna for decades with the least maintenance.
We hope that you found our guide on building DIY barrel saunas helpful.
For any assistance with your sauna project, you can reach out to us.
At Steam Shower and Sauna, we have an extensive inventory of all essential steam sauna components and building parts.
Meaning we’ve got you covered for all your barrel sauna needs.
DIY barrel sauna: Frequently asked questions
Do you need a permit for a barrel sauna?
The answer to this depends on where you live.
For instance, some towns or cities may require a building permit, especially if you’re running electrical wiring or placing it near a property line. However, others might not require anything at all for small outdoor structures.
So, it’s always best to play it safe and just give your local building department a quick call. They can tell you if you need a permit.
How much does it cost to build a DIY barrel sauna?
Building your own barrel sauna can cost anywhere from $3,500 to $8,500, depending on the materials and heater you choose.
Lumber tends to be the biggest cost, followed by the heater. You’ll also need insulation, roofing, glass (if you’re adding windows).
Not to forget some basic materials like paint, sealant, and electrical components.
Overall, here’s a cost breakdown of a DIY barrel sauna based on components you’ll use:
| Component | Estimated cost range |
| Lumber | $1,500 – $2,300 |
| Heater | $150 – $3,500 |
| Insulation | $250 – $500 |
| Roofing & Underlayment | $400 – $600 |
| Glass (for windows) | $100 – $200 |
| Vapor Barrier | $100 – $150 |
| Paint & Caulk | $200 – $300 |
| Hardware & Electrical | $800 – $1,000 |
| Total Estimate | $3,500 – $8,500 |
Note: Costs can vary based on location, materials chosen, and labor.
How long does it take to build a barrel sauna?
The time it takes really depends on your experience level and how much help you have.
If you’re comfortable with tools and building projects, you might get it done over a long weekend.
Nevertheless, for beginners or folks working solo, it could take a few weekends or even several weeks.
That said, planning ahead and having all your materials ready can really speed things up.
Also, some people buy barrel sauna kits, which can make the process a lot faster since most of the cutting and shaping is already done for you.
What are some smart insulation techniques and weatherproofing measures for barrel saunas?
Good insulation is key to keeping your sauna hot and efficient. Materials like rockwool, fiberglass, or sheep’s wool work well between the wooden studs.
My only suggestion is to make sure everything stays dry.
For weatherproofing, stain or seal the outside of the sauna to protect the wood from rain and snow. It’s also smart to raise the sauna off the ground using blocks or a small deck so water doesn’t seep in from below.
Ventilation matters too, so make sure there’s airflow so moisture doesn’t get trapped inside.
Can you install a barrel sauna indoors?
You can install a barrel sauna indoors, but it takes a little extra planning.
First, you’ll need good ventilation because saunas release a lot of heat and moisture. This means fans, venting systems, or open windows to let the air flow properly.
You’ll also need enough space around the sauna so it’s not crammed into a tight corner. That’s because barrel saunas are round and can take up more room than you’d think.
Lastly, your flooring should be water-resistant, since humidity can build up.
How do you maintain your barrel sauna?
Taking care of your barrel sauna isn’t hard, but a little upkeep goes a long way.
Wipe down benches and floors after each use to keep things clean and dry. Also, every few months, inspect the wood for cracks, warping, or signs of mold.
On the outside, reapply stain or sealant every year or two to protect against sun and rain. And if you’re using a wood stove, make sure the chimney is clean and safe.

Jordan is a content writer covering steam showers, saunas, home wellness, and modern bathroom design. With a focus on practical, research-based information, Jordan helps readers make informed decisions about creating relaxing, spa-inspired spaces at home.